
Ever wanted to do a sexy smokey eye, but are scared of looking like you've been punched in the face?! It's honestly so simple, the key is to blend with the right brushes and to have a gradient going from dark up to light (going from the lid to the brow). FYI, I used the Stila 'In The Know' Palette for the majority of this look - its all matte and has perfect shades!
STEP ONE

Start with primed and matte eye lids. You can use a specific eye primer or your concealer, and then set with a translucent powder or an eye shadow similar to your skin tone.
STEP TWO

Take a matte eye shadow that is SLIGHTLY darker than your skin tone, and buff it with a fluffy brush into your crease and upper crease using circular motions. I used a peach eye shadow with a MAC 224 brush.
STEP THREE

Next take a light brown eye shadow with the same brush and buff it directly in the crease, going slightly up, so its just underneath the previous eye shadow you applied.
STEP FOUR

Then take a dark brown eye shadow with a small blending brush, I used a MAC 217 brush, and blend it in the outer corner of the eye and into the crease. You should now see a gradient of dark to light, going from the crease up to the brow, being the dark brown then the light brown and then the peach. Remember to adjust the shades to your skin tone!
STEP FIVE


To create a base for my smokey eye, I took the Eyeko Fat Eye Stick in the colour 'Smoke' and messily applied it onto my eyelid. These jumbo pencils are great for smokey eyes! But you can use any black/dark eye pencil, or even a gel liner.
STEP SIX

Next, take a synthetic flat eye shadow brush and blend out the creamy base over your eye lid to soften the colour.
STEP SEVEN
Now take either a black or dark brown eye shadow (your choice) and pack it onto your eye lid, over the creamy base. Try to keep the darkest pigment of colour at the lashes, so it then gets lighter as you go up the eye lid - which will then flow with the gradient of colours in the crease and upper crease. You might need to build the colour up at the lashes a few times!
STEP EIGHT

Taking a small blending brush, blend a dark brown eye shadow over the dark edges of the eyelid - so the dark brown is in between the black eye lid and the crease colours. Feel free to further darken the crease and outer corner to make the gradient of colours look better.
STEP NINE

Now going onto the lower lash line, run a black eye pencil in your water line and slightly below.
STEP TEN

With a thin, flat brush (MAC 212 brush) blend out the black eye pencil onto the lower lash line and set it with a black eye shadow.
STEP ELEVEN

Lastly take a medium brown or orange toned eye shadow and buff it with a pencil brush (MAC 219 brush) below the black on the lower lash line, diffusing out the colour.
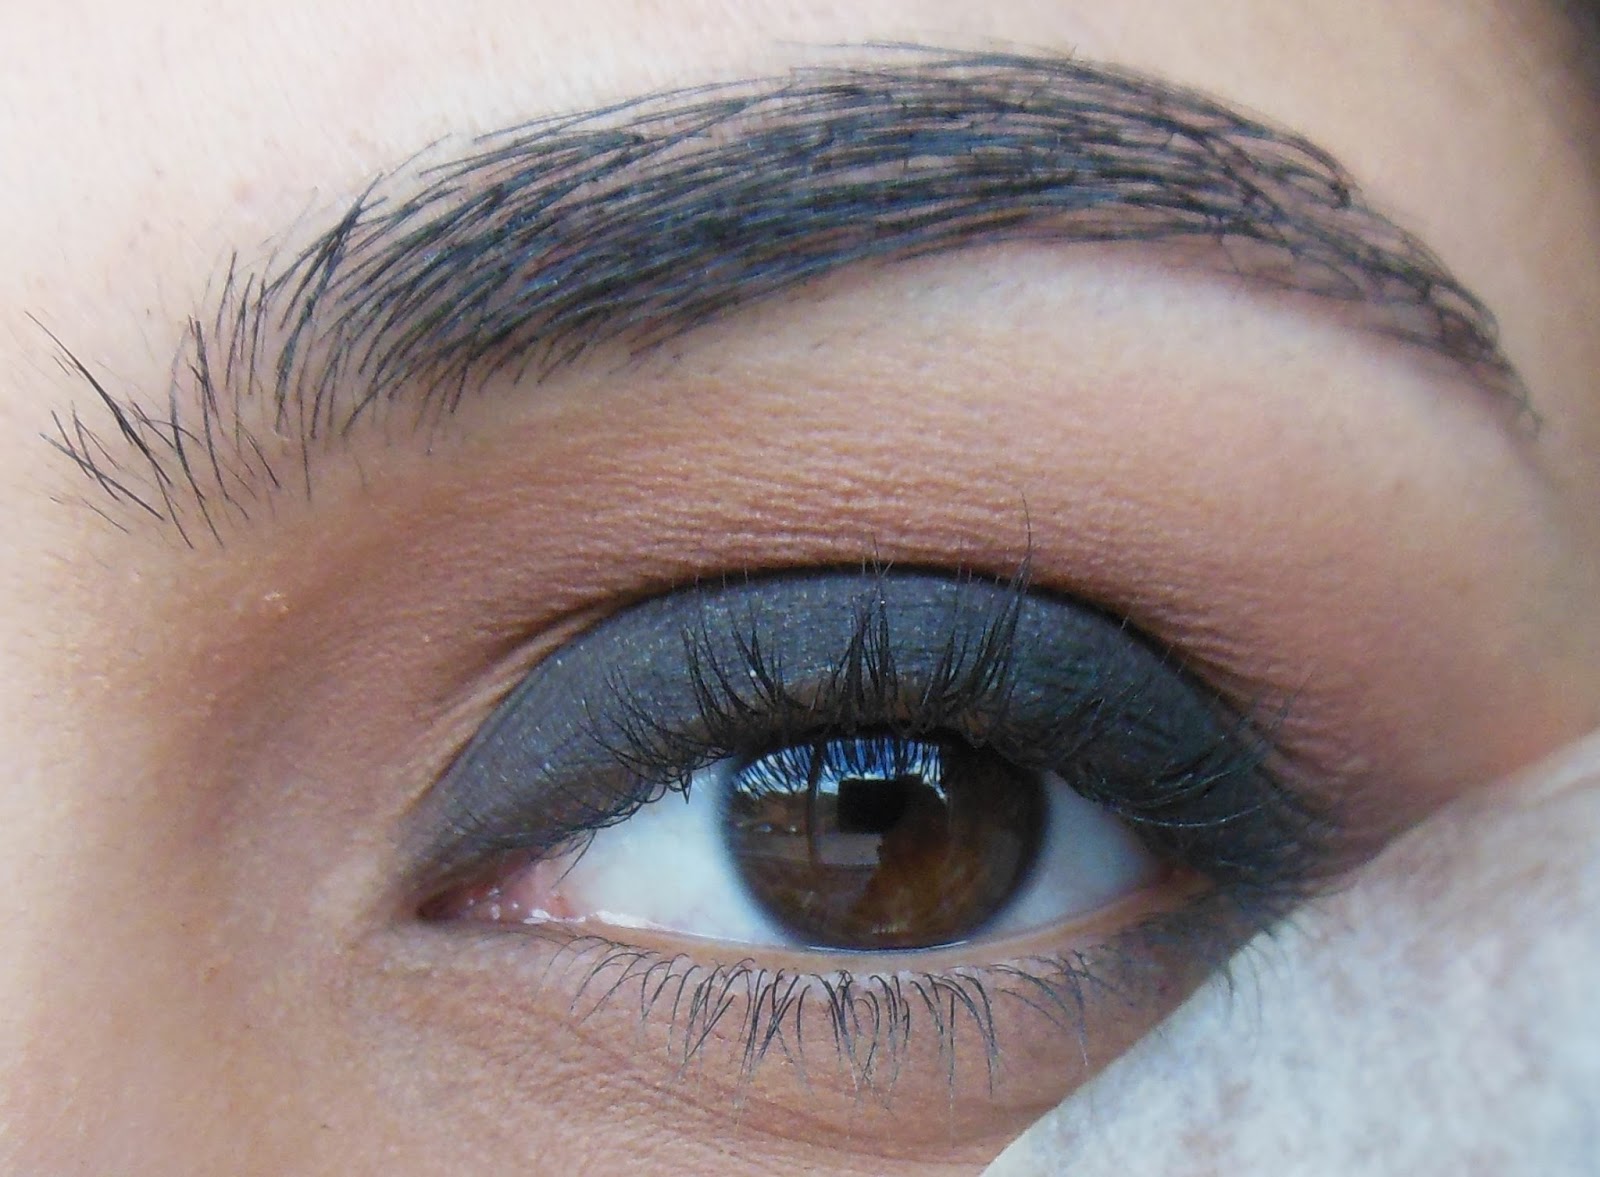
FINALLY add your mascara and false lashes if you like, and you're done!

I hope this pictorial has been easy to follow, so now you all can achieve that sultry smokey eye! It might seem tricky at first, but with the right brushes and eye shadows, you can get that right blend of colours with a perfect gradient. Please leave any feedback in the comments!
xoxo
Beautiful, love it!! Look so easy I can't wait to try it!
ReplyDeletethank you!!! if you try it out and take any pictures, then tag me on Instagram/twitter so I can see :) xox
Delete